This is different for everyone, but my reasons were pretty simple. First of all, it’s MUCH less expensive to use cloth diapers than disposables. Yes, there’s a big cost up front for the initial purchase, but there are adjustable size diapers on the market, as well as the opportunity to buy/sell gently used cloth diapers that your child has outgrown. It also costs money to wash diapers, but it’s a nominal amount if you don’t use a coin-op laundry. Secondly, if you plan to have more than one child, they can use the same diapers your older child(ren) used with no additional cost. Third, there are no chemicals, so no allergies. The biggest thing you have to worry about is what kind of laundry detergent to use when you wash them (and we’ll get into that, don’t worry).
I have a brother and sister who were born when I was 9 ½ and 12, respectively. My mom cloth diapered them part time, so I’ve always been around it. When I got married, I honestly didn’t know anyone did it any differently! It seemed so obvious to me, I couldn’t imagine using disposables all the time. Sure, I saw the benefit when we left the house, but at home, I didn’t understand why anyone would choose to go the more expensive route.
That brings me to my next point, which is that it’s the green alternative – a disposable diaper will take around 500 YEARS to decompose, though no one knows for sure because they haven’t been around that long. Plus, you’re literally throwing your money in a landfill somewhere. According to Consumer Reports, you’ll spend $1500-$2000 per child on diapers alone before they’re potty trained – think how many diapers that equals, rotting in a landfill somewhere. That thought alone kind of makes me gag.
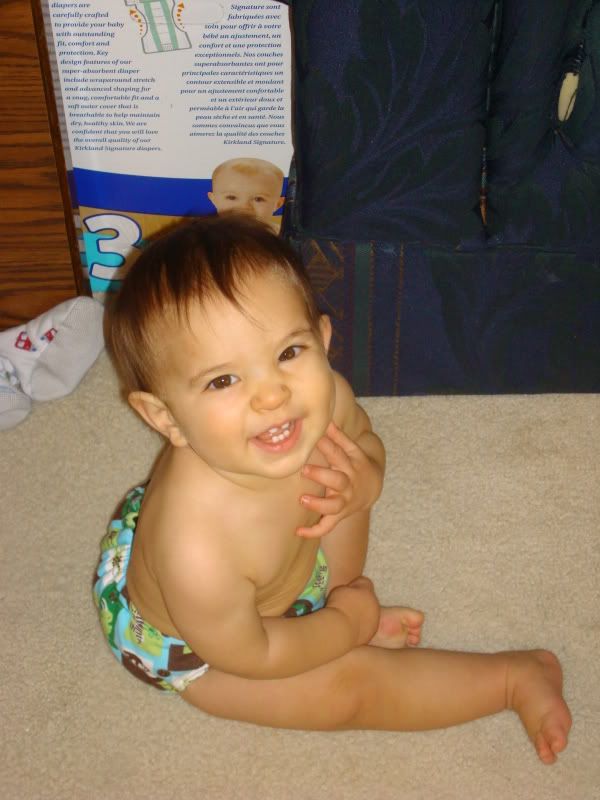
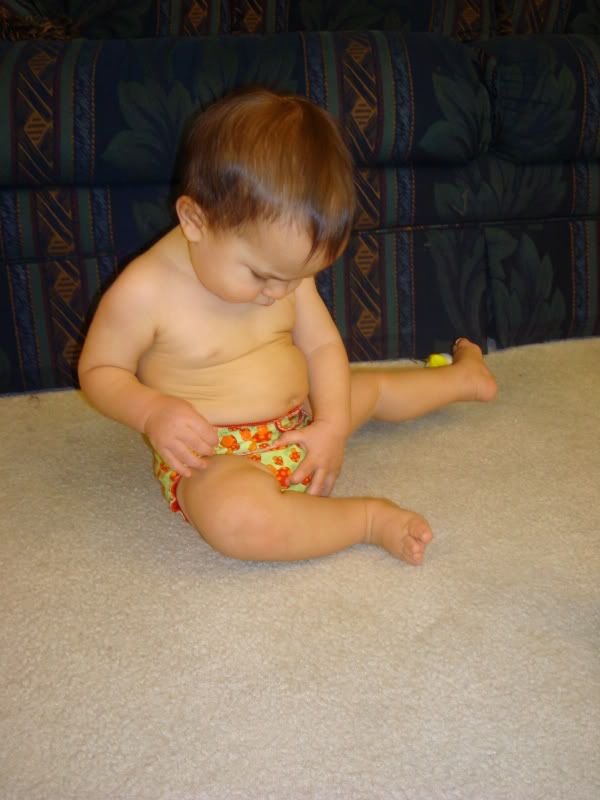
My second son wearing a fitted diaper at about 10 months old
Since I started cloth diapering, I’ve learned that disposables have been linked to problems like infertility. Wait a minute, say what? It’s true - have you ever noticed how many of our peers struggle to get pregnant these days? Studies have linked this trend to increased use of disposable diapers. The chemicals used to make them more absorbent can have horrendous effects on babies’ reproductive systems, plus the heat generated because they are not breathable makes baby boys more prone to problems as well. In fact, did you know that the key ingredient that makes disposables so super-absorbent has been BANNED BY LAW from use in feminine hygiene products? If I’m not going to put something on or in my body, I certainly shouldn’t put it on or in my child! That alone was reason enough for me. There are many factors that lead to this choice for my family, but the biggest one was a health issue.
When I was pregnant with my first child, I brought up the idea of cloth diapering to my husband. I cited the many benefits: save money, no chemicals from disposables (or sposies, as I’ll call then from now on), no dirty diaper rot in my trashcans, no need for any kind of diaper disposal system, and so on and so forth. He adamantly refused to entertain the idea. He insisted they were gross, smelly, and old-fashioned, and that sposies were the wave of the future, both convenient and hygienic.
Our son was born, and we started him off in sposies. He had sensitive skin, but we adapted his diaper changing routine to keep him from getting rashes. Everything seemed to be going well until we approached his first birthday. He developed a severe diaper rash that just would not go away. We tried everything we could think of – rash creams, ointments, powders, Vaseline, Mylanta, air drying, switching wipes, rinsing with plain water instead of wipes, switching diapers. . . we even went to the doctor for a prescription. Nothing helped. It kept getting worse. My poor baby was bleeding, blistered, and miserable. He ran away when he knew he needed a change. He cried as I carried him back. He screamed till he was blue in the face while I changed him as quickly and gently as I could.
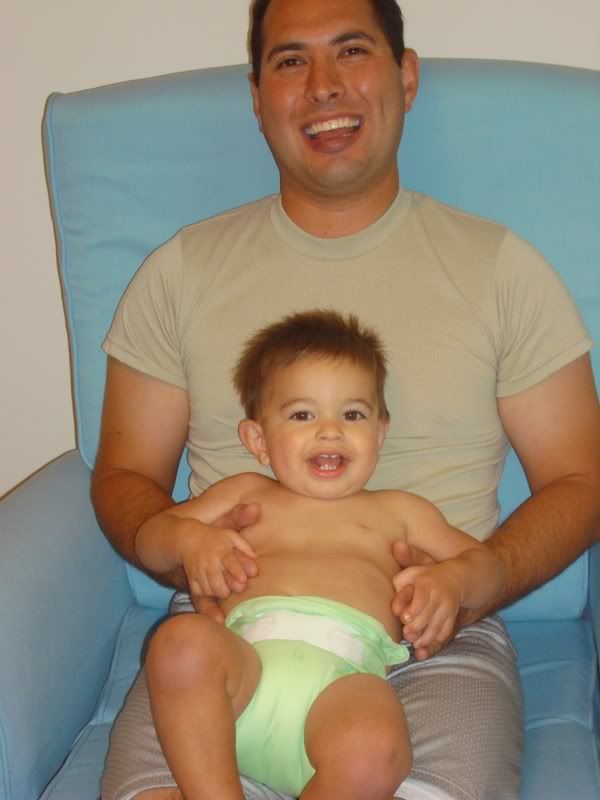
My oldest son in a pocket diaper when he was about 14 months old
I was out of ideas to keep my husband happy with the diapering situation while still seeing that my child was happy and healthy. So I sat down and did the math: to keep our son – an only child at the time – in sposies for one more year, assuming he didn’t go up in size and that he used the same average number of diapers per day would cost $620. That’s not even including things like wipes, ointment, powder, and our son’s constant misery and pain. I knew cloth had to be cheaper than that, but the only cloth diapering I’d ever been exposed to were the prefolds, pins, and plastic pants my mom had me help put on my younger siblings.
I started researching my options online and found that MUCH had changed in the cloth diapering world since my mom had started in the mid-80’s. Yes, there are still prefolds, pins, and plastic pants, but there are so many more options out there now too. There’s a LOT to try and make sense of, so here’s a run down of the basic styles of cloth diapers in use today. All of these will LOOK like a diaper once they’re on, they’re just made of cloth. They have Velcro or snap closures and elastic at the leg openings as well as along the back (usually). Some are front closure (like a sposie), while others have side closures. Neither is better or worse than the other, it's mostly a matter of the fit on a particular baby and your personal tastes. I like side snap diapers best, but only because I feel like I get the best fit on my son with them. I only have 2 or 3 side closing diapers, the rest of my 3 dozen or so diapers have front closures. Keep in mind there are many variations on these, and this list is likely not all-inclusive. It’s just what I’ve seen, heard about, and tried myself. Here it is:
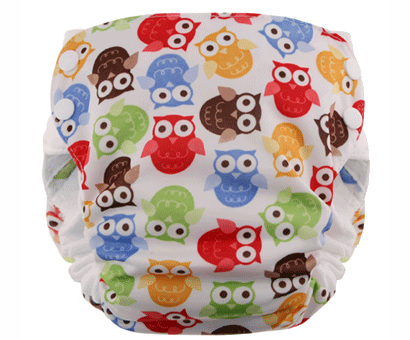
Fitteds
These diapers are fitted to a specific size and have no waterproof layer. When you're home, you really don't NEED a cover, as long as your baby isn't wearing pants or shorts. If you're putting him down for a nap or leaving the house, use a cover. Fitteds usually have inserts that snap into the diaper for easier cleaning and faster drying, as well as adjustable absorbancy. These are the diapers most people like for the really cute prints.
(photo credit: Short Rounds Diapers)
Pockets
The most popular type of pocket diapers (which we own 18 of, though at one point we had 4 dozen) is the BumGenius One-Size 3.0 pocket diapers. About a year ago, BumGenius came out with a One-Size 4.0 Pocket Diaper, which is basically just a newer, better version of the 3.0. These diapers are basically a pocket - the outer layer is waterproof and generally a solid color (not always though, sometimes you can find some really fun prints), while the inner layer is microfleece or some other soft fabric that wicks moisture. Then you have liners you stuff into the pocket based on the baby's size and absorbancy needs. The nice thing about the ones we have is they're adjustable size – My 2 ½ year old wore them as a newborn and they still fit him now! They fit up to 35 lbs, give or take, which is really nice. There are other brands that are not one-size-fits-all, so keep an eye out for that.
(photo credit: CottonBabies)
AOI's (All-In-Ones)
These are exactly what they sounds like. These diapers have the waterproof cover, absorbent layers, and soft fabric against baby's skin in 1 piece. There are no separate covers, no snapping in or stuffing layers for more absorbancy - just put it on and go. These are the closest to a disposable diaper that you can get with cloth. However, they take FOREVER to dry - 2-3 times longer than other types of diapers - so they can be a hassle in that regard. They also cost more than other styles.
(photo credit: Swaddlebees)
AI2's (All-In-Twos)
These diapers combine all the convenience of AIO's with the drying time of a fitted by using a snap-in liner that you can remove for washing and drying purposes. However, these tend to be the most expensive type of diapers.
(photocredit: Diaper Junction)
Prefolds and Flatfolds
These are the cloth diapers your mom and grandma used. Prefolds are rectangular and usually have 2 lines sewn length-wise down the diaper, dividing it into thirds. There are as many ways to fold a prefold as there are babies. YouTube has a ton of videos to demonstrate the more popular techniques. Flatfolds are what a prefold would look like if it hadn’t been sewn into that nice, neat little rectangle. There’s more folding involved, and I’ve never personally used one, but everyone I’ve ever heard of that tried them absolutely loved them and never went back. They’re one of the most customizable diaper styles out there, so you can get the exact absorbency your baby needs exactly where they need it.
(photo credit: Green Mountain Diapers)
Hybrids
Hybrid diapers are things like gDiapers. They combine a washable, waterproof cover with a disposable (generally flushable) insert. Many people who use them will use a prefold as an insert at home and save the disposable inserts for when they’re out and about.
See what I mean? There are so many options! Now, you may have noticed, a few of these styles don’t have a water-proof layer (fitteds, prefolds, and flatfolds). There are nearly as many options for covers as there are for diapers. You’ll need 2-4 covers total - 1 to use, 1 to have ready. Just alternate throughout the day and wash when they get messy on the outside or it's time to wash the diapers (wool is a different story, but I’ll talk about that in a minute). Here’s a basic list:
Plastic Pants
This is what my mom used when her kids were in diapers. They’re vinyl with elastic at the legs and waist. They go on like a pair of pants. They’re cheap, they’re easy, and they wipe clean in a pinch. I haven’t used plastic pants with my kids, but I know they work. They’re also the cheapest option.
PUL
PUL is a laminated polyester fabric. It’s popular because it’s much trimmer and cuter than the plastic pants of yesteryear, but it’s still affordable. There are many companies that make these kind of covers – some have snaps, some have Velcro. It’s all a matter of personal preference. Solid colors are most popular, but you can find prints if you look hard. PUL covers are nice because the inside is laminated, so if it gets messy, you can just wipe it off and hang it to dry.
Wool
Wool is by far the most expensive, but also, in my opinion, the cutest. I have a few pairs of wool pants (also known as longies – there are shorties and skirties too) that I use on my toddler in the winter. I like them because they're just knitted pants that do double duty as a waterproof diaper cover as well. These require special care and HAND washing. They need to be lanolized after each washing to ensure they remain waterproof. Unless they get poop on them, you don’t need to wash these more than every 6th or 7th use. Lanolized wool has antibacterial properties, so not only are they waterproof, breathable, natural fibers, but they’re good for your baby or toddler as well.
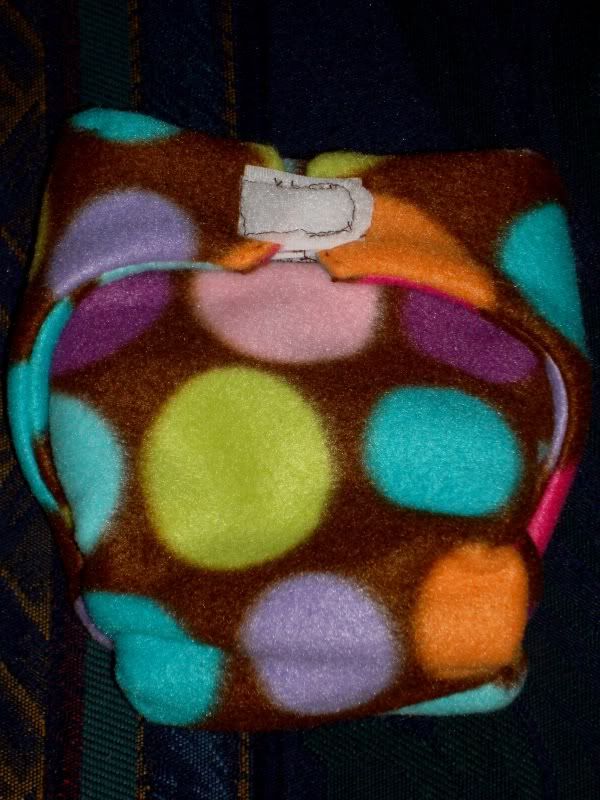
Fleece
Fleece covers are a great alternative to wool when you want something warm, but don’t have a ton of extra money to spend. They’re waterproof, though sometimes you’ll experience compression wicking (small amounts of leakage where something presses against a wet diaper, like a carseat buckle). I personally have never had this issue, as I buy only the highest quality fleece for diapering purposes.
(photo credit: I made this myself!)
Now that we’ve covered all the diaper and cover info, there are a few more things you’ll need to get started. Not all of these are a must, but they are nice and make things much easier:
Diaper pail
This is non-negotiable. You need somewhere to keep dirty diapers till it’s time to wash. It doesn’t need to be fancy, just functional. I use a plastic Sterlite trash can with a locking lid that I got at Target. I rarely use the lid because I’ve found that leaving it open actually makes things smell much less.
Wetbag
Some people prefer a wetbag to a diaper pail. You have to choose one – though you can do both – but you can’t do neither. A wetbag is a bag w/ either a drawstring or zipper at the top and is waterproof. They’re generally lined with PUL and have a fun print on the outside. They come in all sizes, and many places will do a custom size if you ask. One option I like is when the maker sews a small square of fleece or flannel to the INSIDE so you can put a couple drops of essential oil on it to keep things from smelling gross.
(photo credit: CottonBabies)
Sprayer
In my opinion, this is an absolute MUST. Once your baby is eating/drinking anything other than breastmilk (even if it's only formula), you need to spray the poop off. I’ve tried every method I could think of to avoid buying a sprayer (they run about $50), and nothing worked. I tried the dunk and swish I remember my mom doing, I tried scraping (ew!), I tried using my shower sprayer. None of it did anything for poop. The sprayer hooks to the toilet (there are instructions included with the sprayer) and is pretty easy to install.
(photo credit: CottonBabies)
Pins or Snappis
If you do prefolds or flatfolds (or certain brands of fitteds, like Bagshot Row Bamboo Fitteds), you'll also need diaper pins or snappis. Snappis are far less likely to stick a baby with a sharp end, and they're so much easier to get a good fit.
How to Use a Snappi Video:
(link: http://youtu.be/2_r2K1d9WFM)
(link: http://youtu.be/2_r2K1d9WFM)
Cloth Wipes
Cloth wipes are great when you cloth diaper. You don’t have to try and figure out what to do with a poopy wipe after you’re done changing a diaper, and when you make your own wipes solution, you know exactly what you’re putting on your baby’s most sensitive parts. Personally, I use baby washcloths and a spray bottle of water. I like to add a couple drops of tea tree oil and peppermint oil to my water b/c they have healing, cooling properties that are soothing for little butts. When we're out and about, I use disposable wipes, but I like the cloth ones when we're at home.
(photo credit: CottonBabies)
Dye-Free, Fragrance-Free Laundry Detergent
You need to wash in a dye-free, fragrance-free detergent. Do NOT use dryer sheets or fabric softener. The perfumes in them will make the diapers smell worse. Hanging diapers to dry is popular (it saves energy, plus the sun will help bleach any stains and kill bacteria), but I just always use the dryer, mostly because we don’t have anywhere to hang them. You only need to use about half the amount of detergent you'd normally use, then do a 2nd rinse to make sure you get it all out. I like to rinse with no detergent before I wash, wash with detergent, plus white vinegar in the bleach dispenser, another rinse, then dry. The vinegar will help get out stink and stains without having to use bleach. The pre-wash rinse will get any junk off the diapers before the actual washing.
This seems like an awful lot of stuff to invest in without knowing if you’ll like it or if it’ll work for your family. Thankfully, there’s a solution for that: Jillian's Drawers. It's a trial program where you fill out the form online and pay $161.94. They send you enough diapers to last about a week, which you get to try for 21 days. Then, at the end of the 3 weeks, you send back whatever you don't want and they refund your money. If you send everything back, they'll refund you all but $10; you’re also free to keep everything and get no refund, or return a few things and get a refund on those items only. The diapers are all brand new, no previous users, so you need to prep them (wash and dry a few times), but otherwise that's it.
What if you don’t have $160 just lying around? You still have options! You can start by buying 1 or 2 diapers per month off a site like DiaperSwappers (it’s free to join). It's mostly used diapers, though you can find new ones every now and then. They're generally a big discount off what you'd pay for them brand new. Then, if you decide you don't like cloth or a certain diaper just isn't working for you, you can put it back up for sale there. You just need a PayPal account for the buying/selling, and until you get feedback there, most people are happy with feedback from other places (like eBay or Amazon, as well as places like Etsy or Hyena Cart). We’ve gotten many of our diapers from DiaperSwappers, and I love them! I’ve also sold quite a bit of things we weren’t using anymore and gotten great deals. The best part is, the prices aren’t set in stone; if you see something listed for more than you’re willing to pay, make them an offer of what you are willing to pay. Many times, the seller will say yes! Sometimes they’ll also take a trade or a partial trade as payment.
Here’s an idea of what we have in our house and what works for our family:
My Diaper Stash
18 BumGenius One-Size 3.0 Pockets that I had snap converted (when I bought them, they only had Velcro closures; BG has since added the option to get snap closures)
8 medium-sized fitteds from various companies (my favorites are the 3 Short Rounds fitteds I lucked into – 2 were free, and the 3rd was only $7 including shipping)
3 medium-sized thirsties PUL covers
4 woolies – 1 recycled (pants made from the arms of a sweater), 1 interlock, on crocheted, and one knitted. My favorite is the interlock.
3 wetbags - One holds 2 diapers or 1 diaper and a set of dirty clothes, one holds about double that, and the 3rd holds about 40 diapers (I got that one for when we drove to Maryland from Colorado last summer and knew I wouldn't have access to a washer for 3-4 days).
Diaper sprayer – hooked up to the toilet in the kids’ bathroom.
Diaper pail – really just a heavy-duty plastic trash can I got at Target.
Flannel liners – I have a few dozen of these that I use occasionally. If your little one needs to us a diaper rash cream or ointment, these liners are really great for keeping the goop off the inside of the diaper and causing stains.
Baby washcloths – I have probably 4 or 5 dozen of these, and they’re perfect for wiping my son’s little butt. I had about a thousand of them anyway, and I never used them. It seemed like the perfect solution!
8 oz. spray bottle – I use this to spray my cloth wipes before using them. I just fill it up with tap water, add a couple drops each of tea tree oil and peppermint oil, and keep it next to my pile of wipes.
Newborn stuff: 24 unbleached Indian prefolds, 4 thirsties PUL covers, and 2 or 3 Snappis
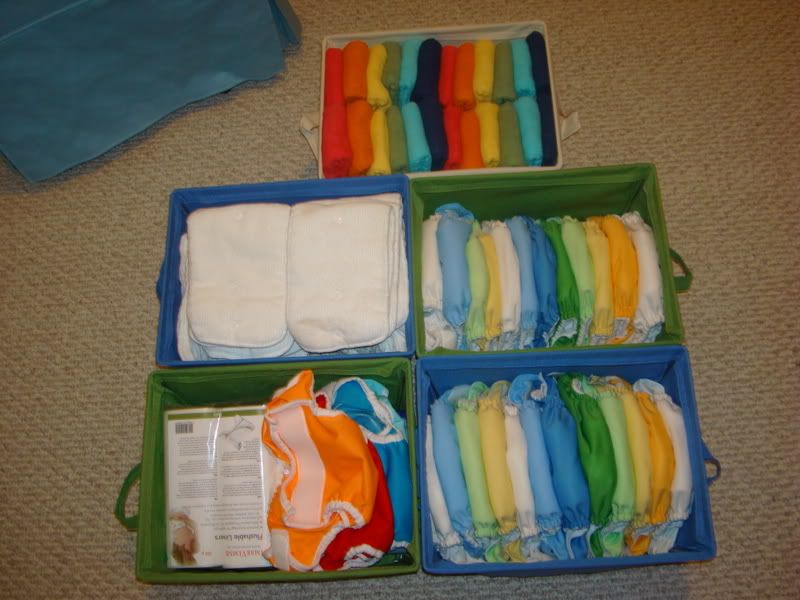
My Newborn Stash and BumGenius Diapers; I dyed the prefolds with Dylon dyes because I think white diapers are boring diapers.
Stuff I’ve Tried and Hated
* Flushable liners – some people love them and think they’re great, but my kids have sensitive skin and complained that it made them itchy. It wasn’t worth the money I was (quite literally) flushing away for the convenience. However, if they hadn’t had sensitivity issues, these would have been GREAT for dealing with poopy diapers without having to spray them off.
* Keeping cloth wipes wet – I haven’t personally tried this, but I’ve heard they get moldy in a day or 2, so I just never went there.
Closed diaper pail – can you say, “Pee-ew!” Yeah, that’s what I thought. Just don’t even try it.
* Wet diaper pail – it encourages mold and mildew.
* Rockin’ Green Cloth Diaper Laundry Products – soap residue builds up in your diapers (especially microfiber, yuck!) and makes them dingy, gray, and stinky. They make a product called “Funk Rock” which is supposed to help with this problem, but everyone I’ve heard of who’s tried it has told me it just made the problem worse.
Tips & Tricks I Love
* Baking soda in the diaper pail – just a little sprinkle of baking soda after each diaper addition will help absorb smells and moisture while keeping the rest of your house smelling great. This is also why I do a pre-wash rinse – I don’t want to find out what it would do to my washer if I added vinegar to the mix! I get all the baking soda off first, THEN add vinegar.
* No wetbags – once my son started having more solid poop, I stopped carrying a wetbag with me. If they don’t have liquid poo, you can just wrap the diaper up the same as you would w/ a sposie and stick it in the diaper bag. Some people like a wetbag anyway, but I’ve found the diapers are far easier to deal with (smell-wise) when they haven’t been in a waterproof bag for a couple hours.
My Wash Routine
This will vary from person to person. It’ll depend if you have a high efficiency or traditional washer and dryer, how many diapers you have vs. how many kids are using them, how much other laundry you have to do, and how much you hate doing said laundry. I only have 1 in diapers right now and we have a pretty large stash for him. I also own HE machines. I wash 3 times per week in addition to my regular laundry (I have 2 dedicated laundry days; I do NOT do my diapers on those days).
1) Cold rinse, no detergent.
2) Sanitize cycle with detergent. I also add white vinegar to the bleach dispenser.
3) Cold rinse, no detergent
4) Dry
Every now and then (generally every 2-3 months for me), you’ll notice your diapers aren’t absorbing well or look dingy or smell. . . funky. You’ll need to strip them when that happens. It’s pretty easy, just tedious. I’ve never stripped anything other than my BumGenius inserts, which are white, and I haven’t needed to do it since I got my HE washer. That being said, here’s what I did in my top-loader for my white inserts:
1) Normal wash routine, but don’t dry.
2) Separate the inserts from the rest of the diaper laundry. Put all the non-insert things into the dryer.
3) Add ½ c bleach and 1 tablespoon blue Dawn dish soap and run the hottest cycle.
4) 2 additional very hot washes with not detergent, bleach, or anything else.
5) Dry
I do not use cloth when my son has diarrhea, and I use sposies at night, mainly because his pee has a lot of ammonia in it, and when we’ve tried him in cloth at night, he wakes up with chemical burns every morning. My older son didn’t have this problem, so he wore cloth at night.
I like to use prefolds with PUL covers or wool for newborns, simply because it’s the best way to get a good fit every time and prevent leaks while still protecting their little umbilical cord stump from getting bumped or irritated.

Helpful Links and Resources:
www.cottonbabies.com
www.diapersetc.com
www.diaperswappers.com
www.greenmountaindiapers.com
www.hyenacart.com
www.jilliansdrawers.com
www.youtube.com (for tutorials on how to use cloth diapers and their accessories, as well as how to make your own diapers if you want)
